
Have you been “blessed” with bees living in your home? Don’t worry, I can help.
This part of my business has a Google Business listing: Henry’s Honey Bee Rescue. You can read customer reviews here.
If the bees are in a cluster outdoors, please visit my Swarm Collection page here.
If the bees have died and there is honey leaking out of your ceiling/wall/fireplace, you will find more details here.
You will find very short (entertaining?) videos of bee removals on my Instagram page here
I regularly remove bee colonies from the walls and ceilings of homes. They have worked hard to build their homes, but it is not practical to leave them in place long-term. The problem will only get worse as their nest gets larger. Being incredibly valuable to the natural environment and out of respect for them as creatures sharing our planet, I try hard to relocate bees from difficult situations.
It may be quicker/cheaper to have the colony killed by an exterminator, but if the dead bees are left in place, they will create a foul smell as the bees and larvae go rancid. Additionally, if the honeycombs are left in place, they will attract ants and mice… Often the honey will be disturbed and will start to leak out of the walls months later. About 1/4 of my “removal” jobs are to remove dead colonies that are leaking honey. It is therefore usually best to open the wall/ceiling plasterboard to remove the entire bee colony and honeycombs.
I usually INCLUDE restoration of the Gyprock plasterboard, leaving it in a paint-ready state so you do not need to get another tradie to finish the job.
I cover ALL Sydney suburbs for larger jobs.
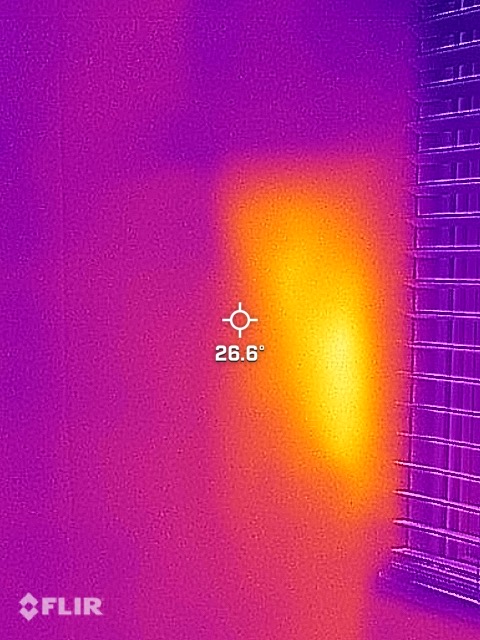
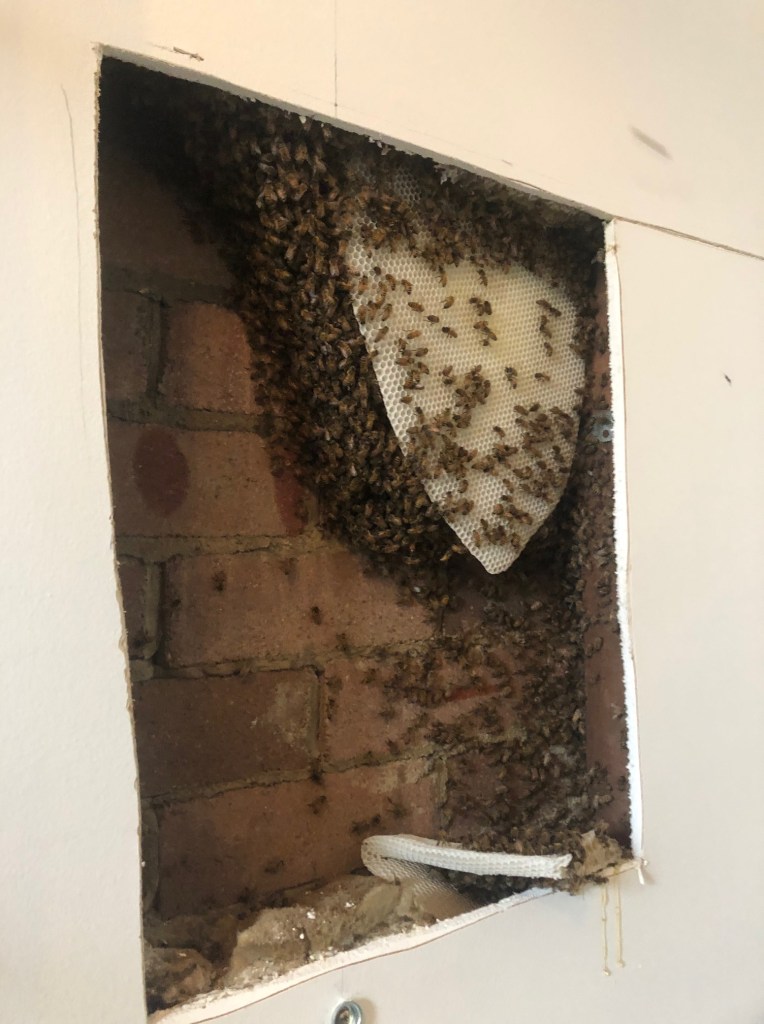
Below is a typical colony, in Beacon Hill, after just 2 weeks. The thermal camera confirms their exact location behind the Gyprock. The bees bring honey with them and their wax-glands are in high-production when swarming, so the first combs get built very quickly. The last photo shows the completed job with wall repaired and ready for painting after the plaster has dried.
This colony, in Merrylands, was just 2 months old. The white area on top is honey, the orange area in the centre is the bee pupae, and the yellow part at the bottom is new beeswax comb with eggs.

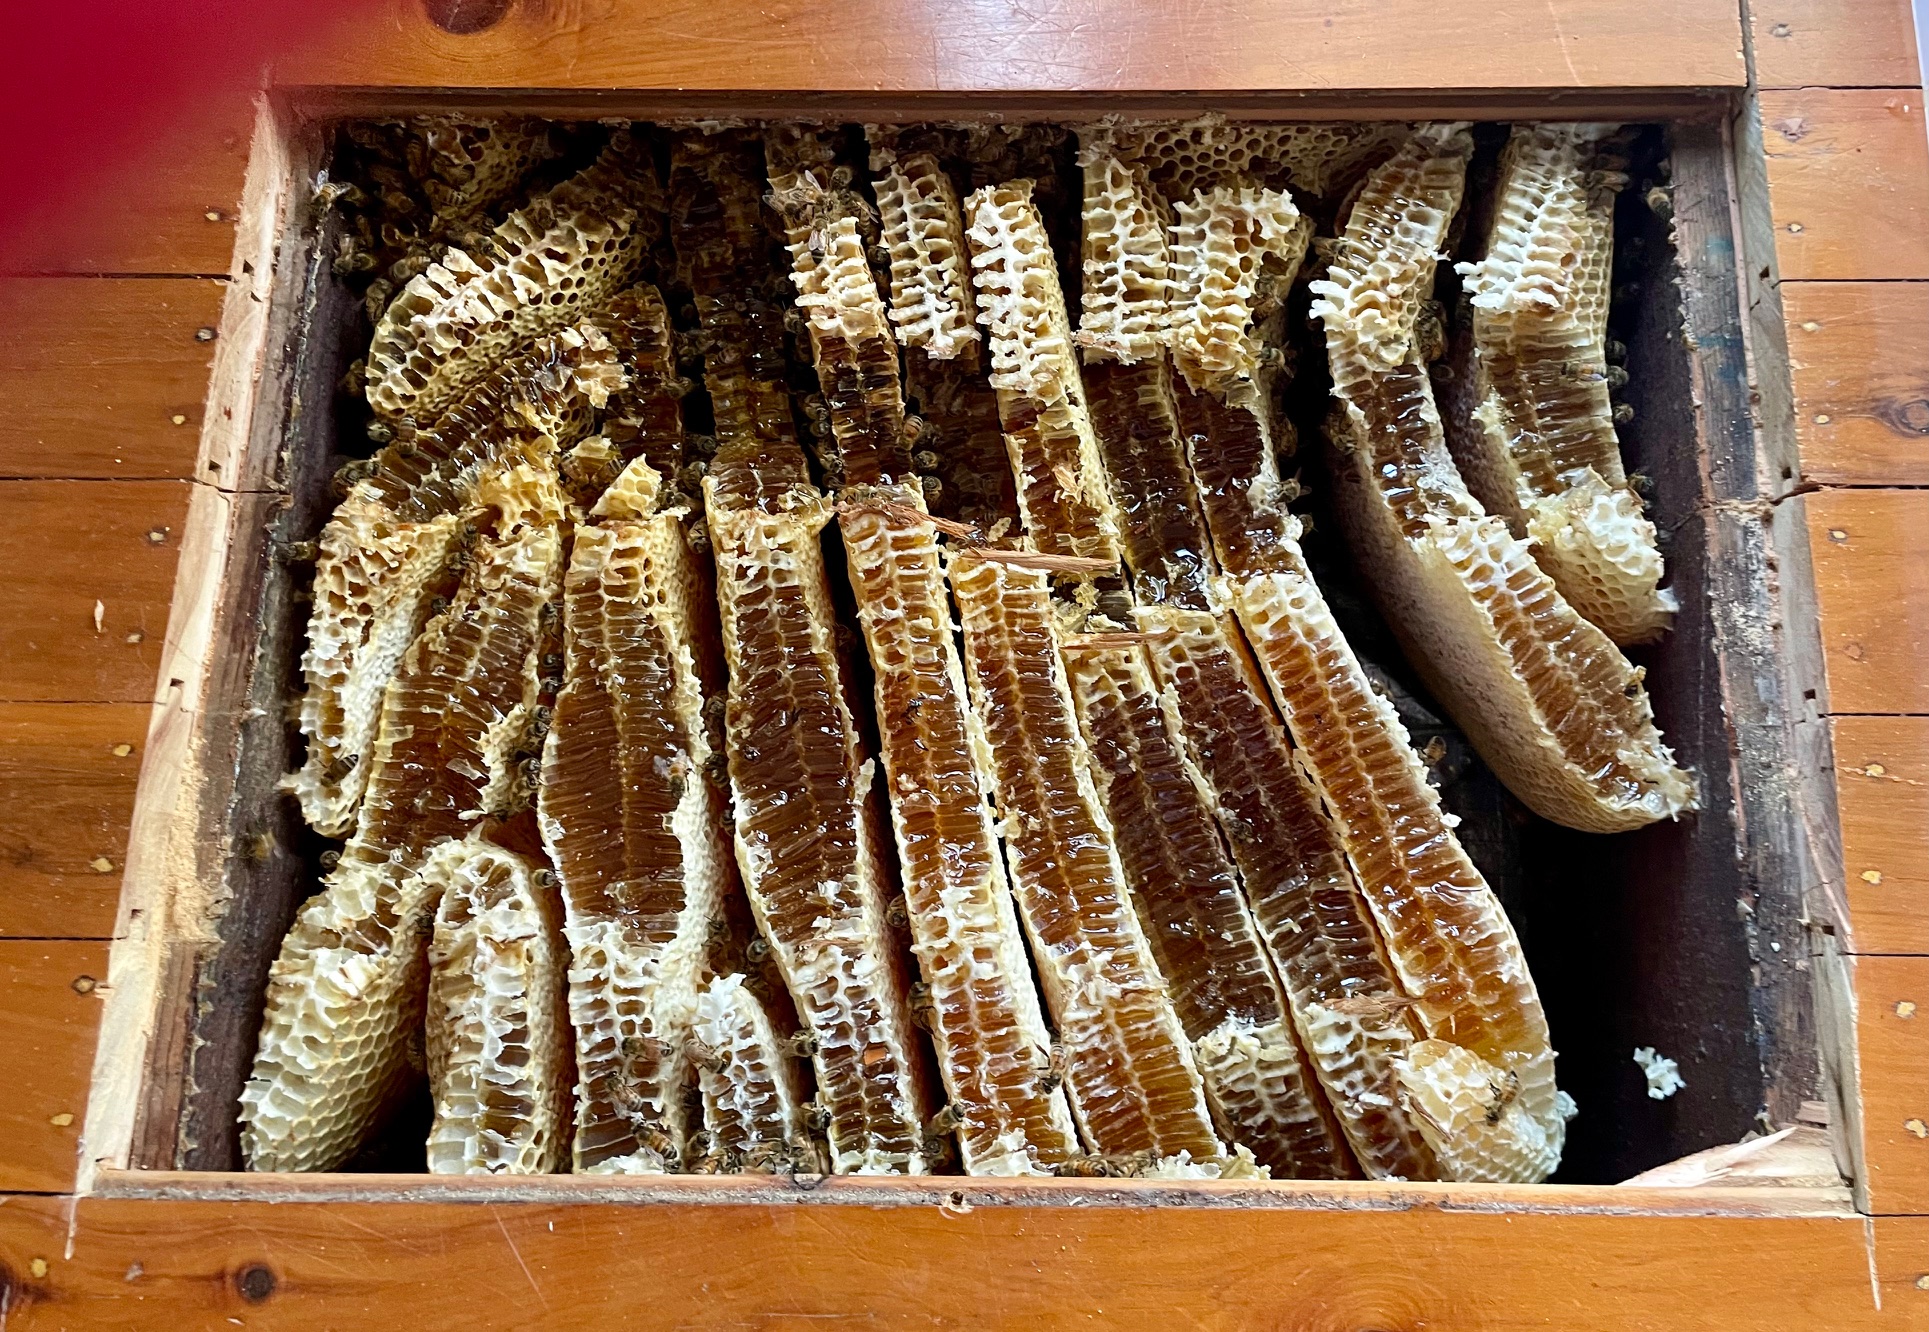
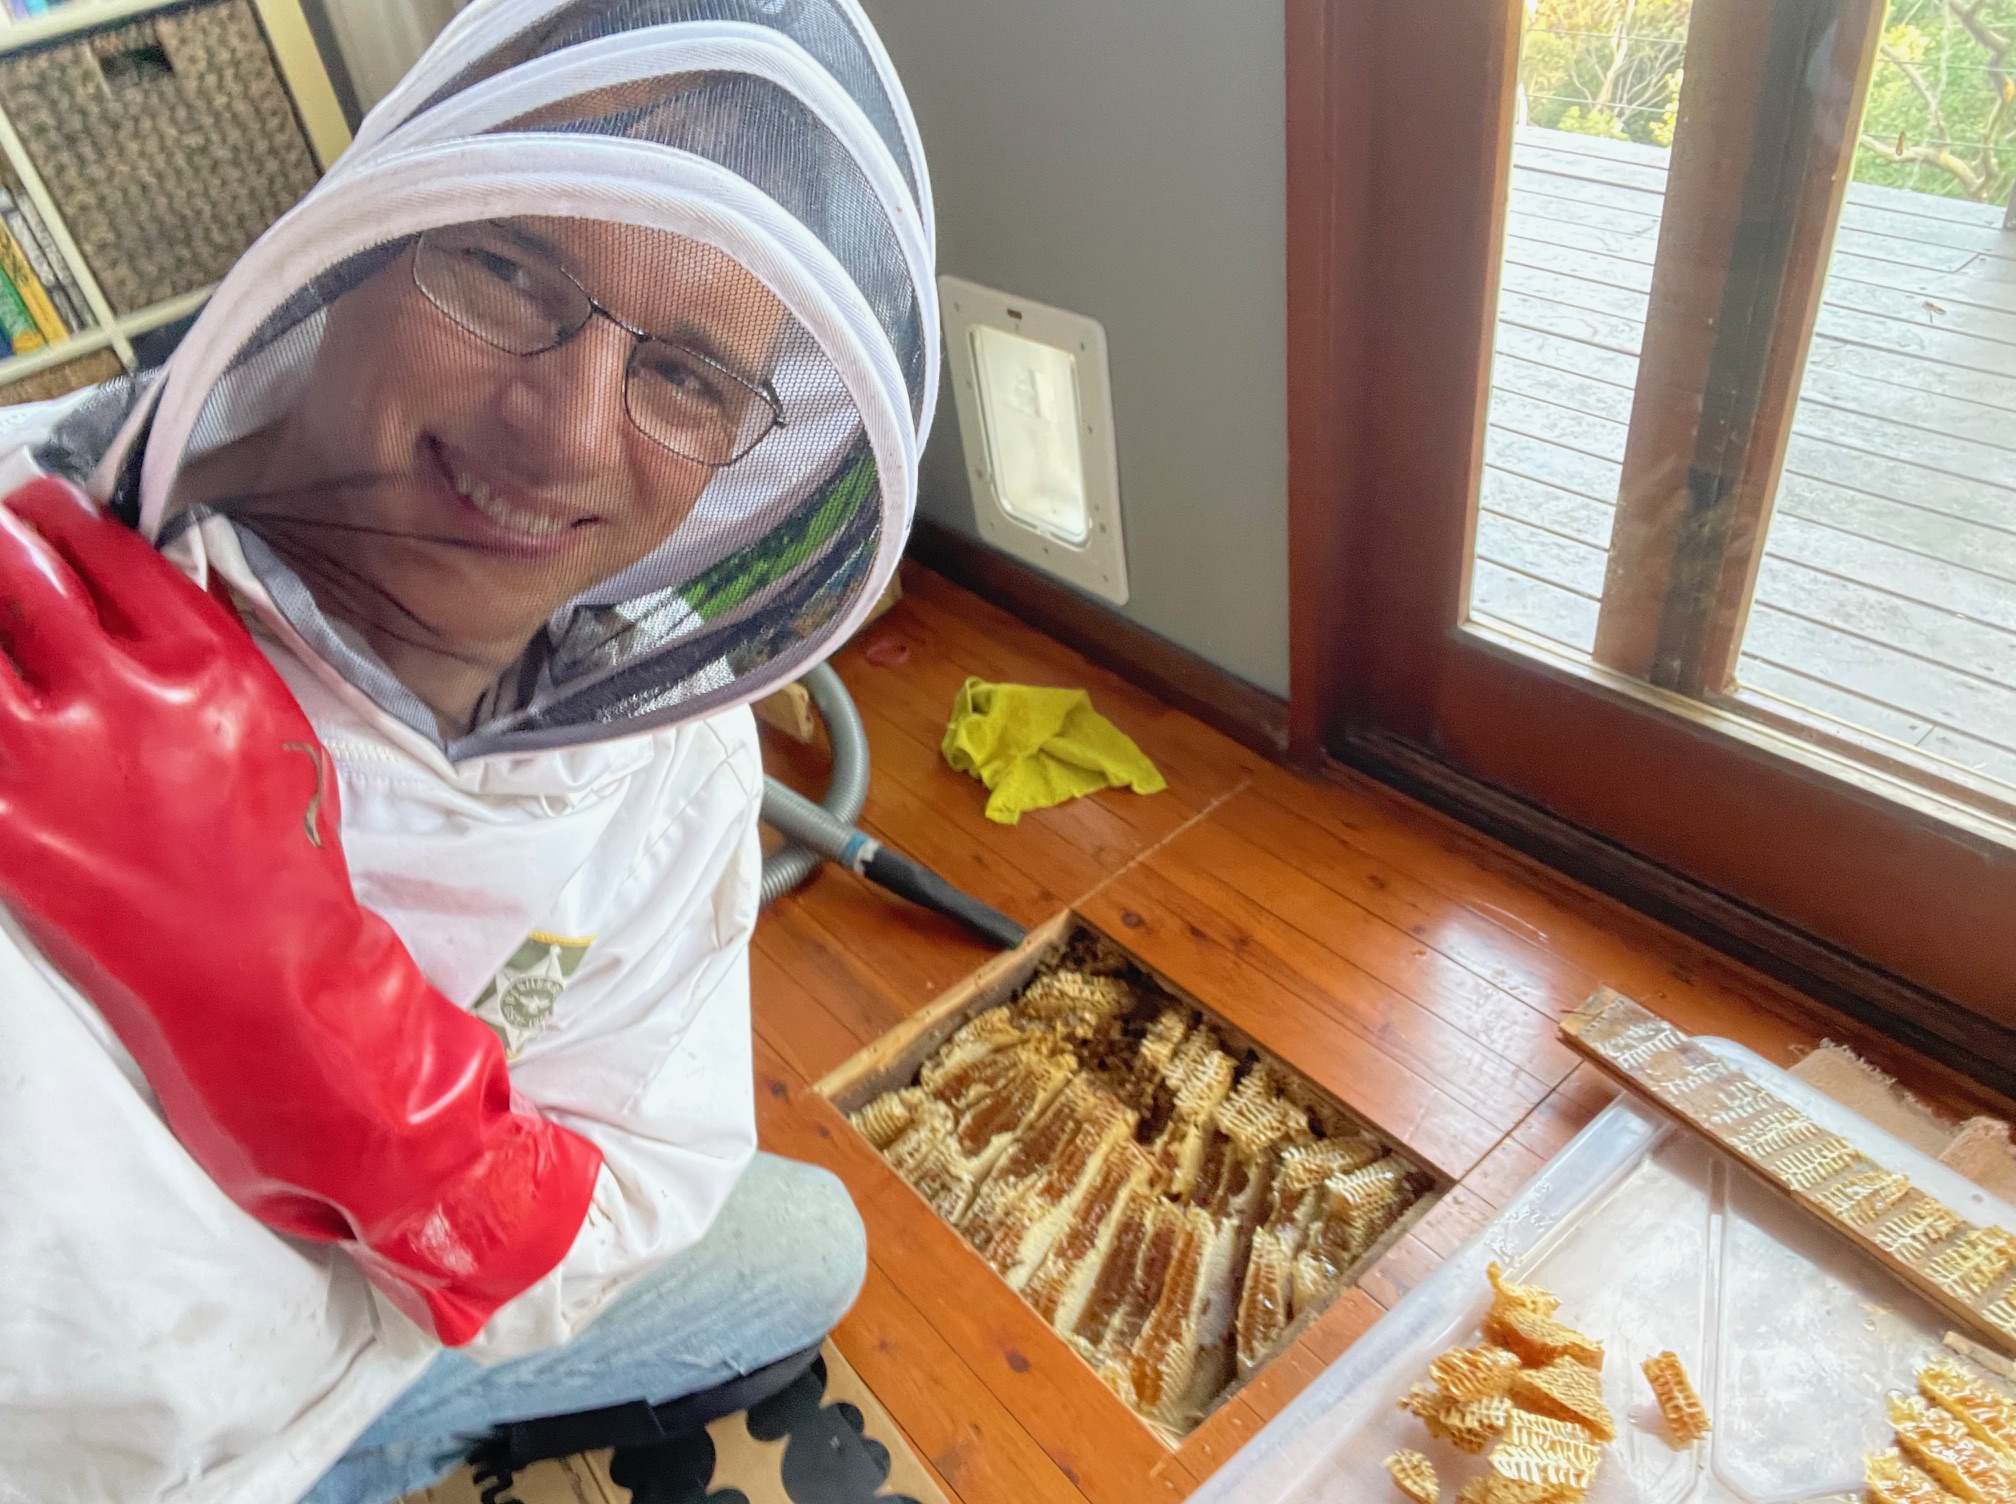
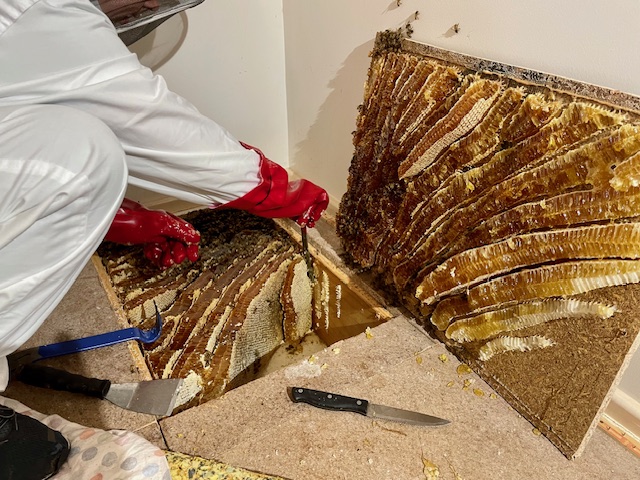
Slightly less often, bees will move into the cavity between floor joists. Dogs will often nap in the warmth on top of these colonies! The photo below shows only 1/3 of the colony. There was over 30kg of honey in this nest.
I would not normally cut into a hardwood floor like this, but the homeowner was planning to replace it in this case. If this was not the case, I would have removed the nest from below.
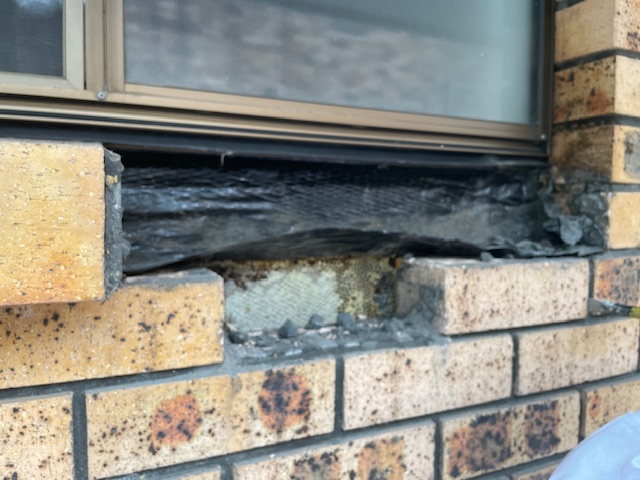
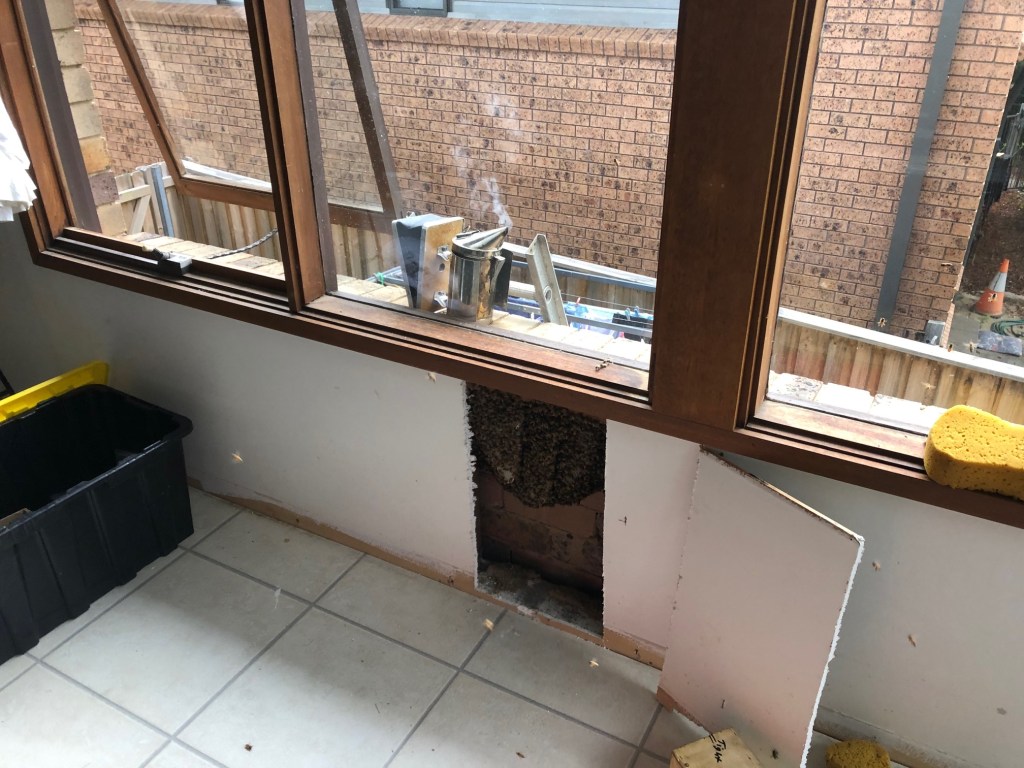
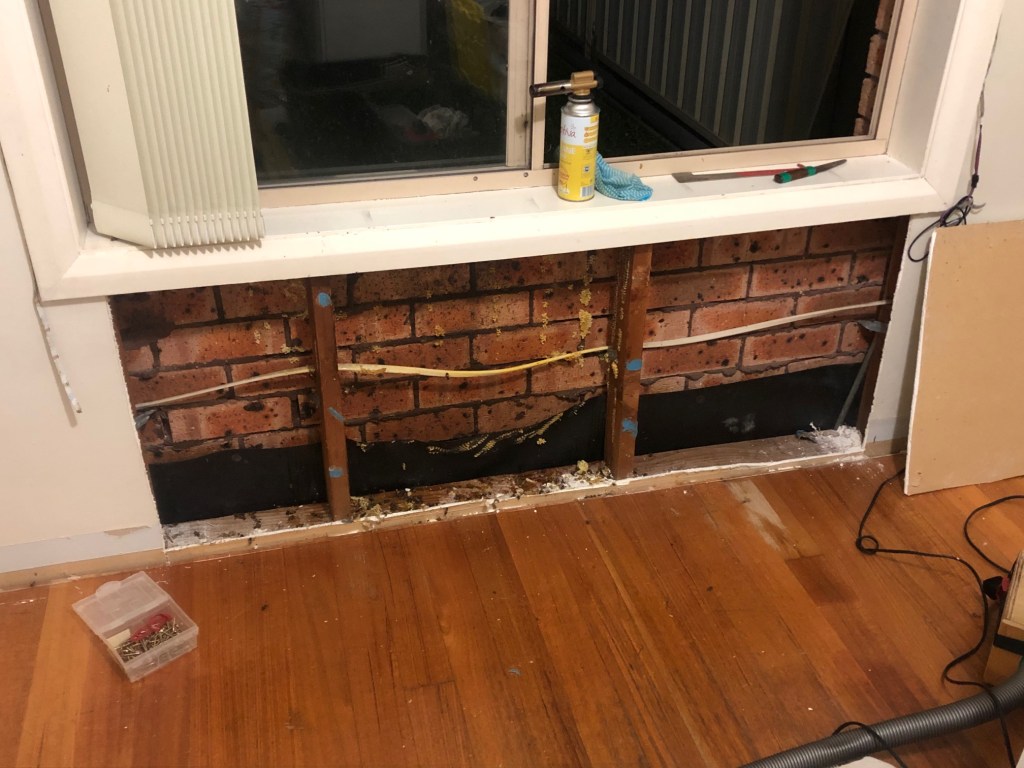
This project in Hornsby was complicated by a recent bathroom remodel where the bees had nested. The homeowner did not want to disturb the bathroom, so we went through the outside wall instead. I have a bricklayer friend, who also helped with the removal, so we finished the removal and repair in one afternoon. The bottom of combs are typically not attached to anything, so we only had to remove 10 bricks and pull up the combs through the gap. The additional cost of repairing the tiles or re-setting the bricks is about the same. Compared to removing bees through a plasterboard wall, access via brick wall added about $400 to the total cost.


Bees will occasionally move into the roof cavity. This colony in Mosman had only been there for 3 months. I finished the job with roof-tiles replaced and in water-tight condition, but referred them to a roofer to re-point the cement on ridge tiles.


Some colonies are very modest in size. This one in Chatswood was living in a hollow post. There was no charge for removal of this colony, I only asked the homeowner to buy some of my honey.


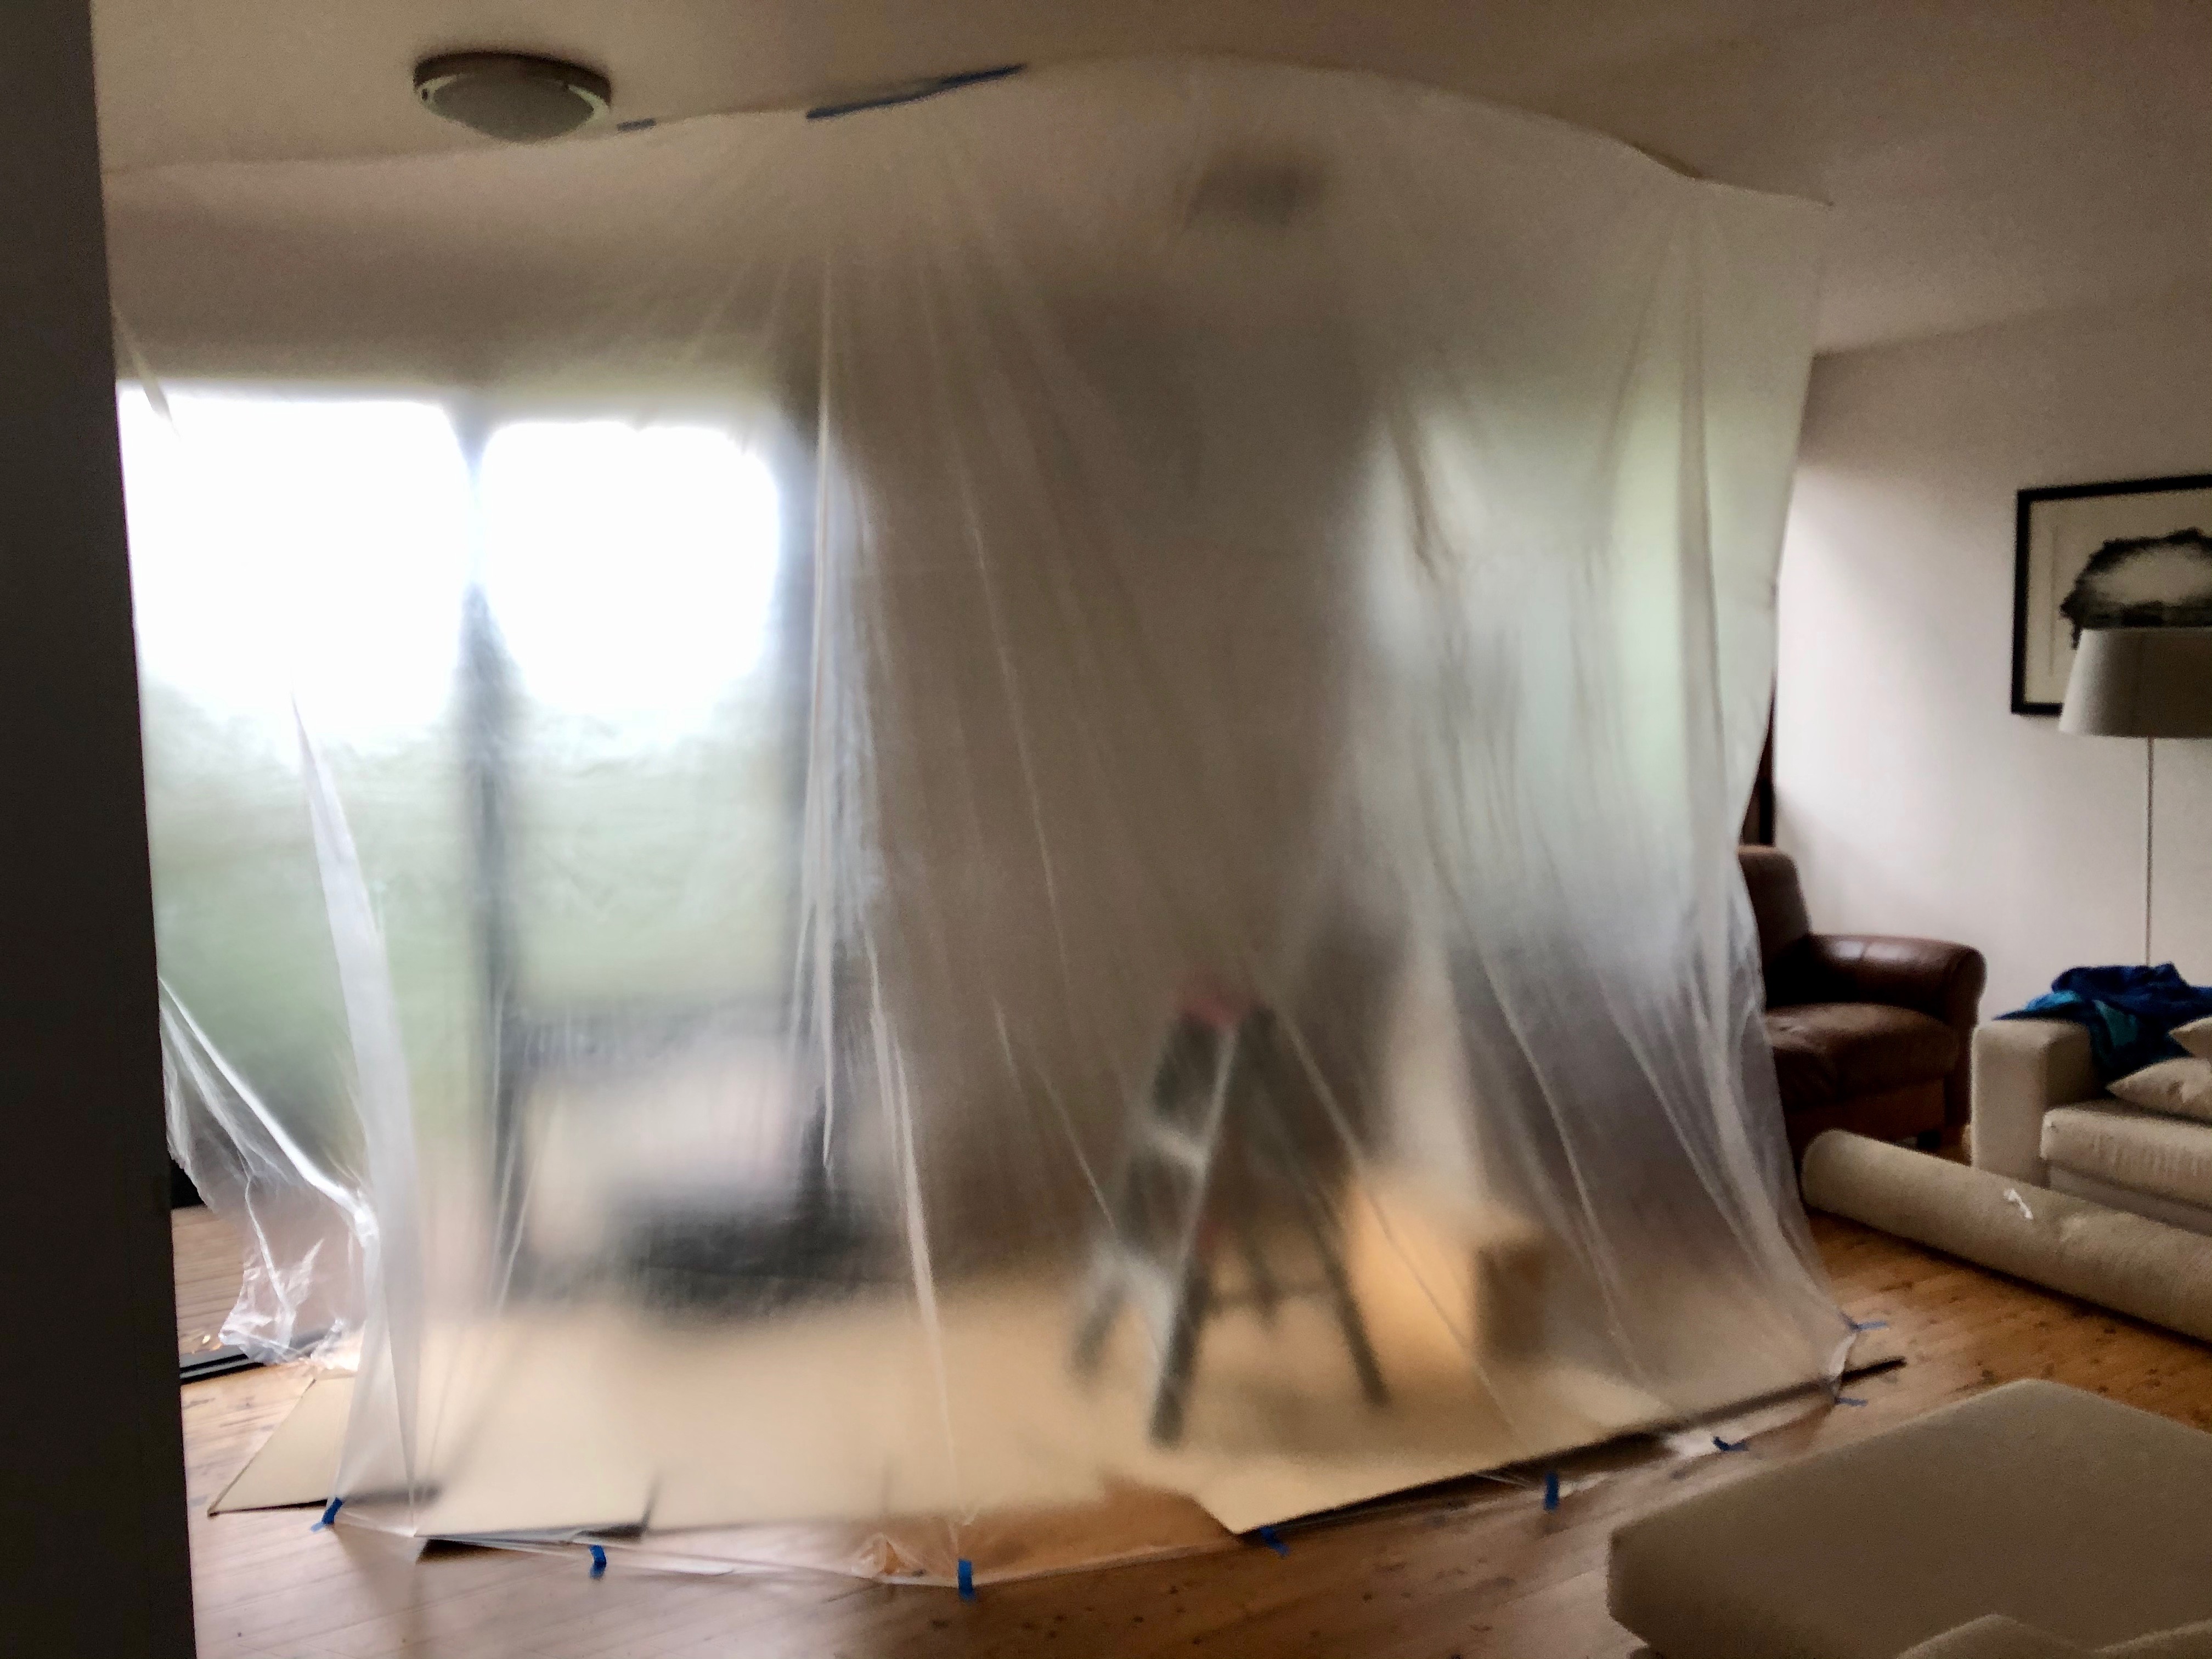
This house in Lane Cove had an open floor-plan, so I installed sheeting to keep the bees and smoke out of the house. The colony had only been there for 3 months but had collected over 10kg of honey…
Bees will also move into possum-boxes. This one in Ryde was overflowing with bees, making removal especially challenging!
Here is a short video showing removal of bees from a possum-box: https://www.instagram.com/p/CxsuCDXy9Qc/
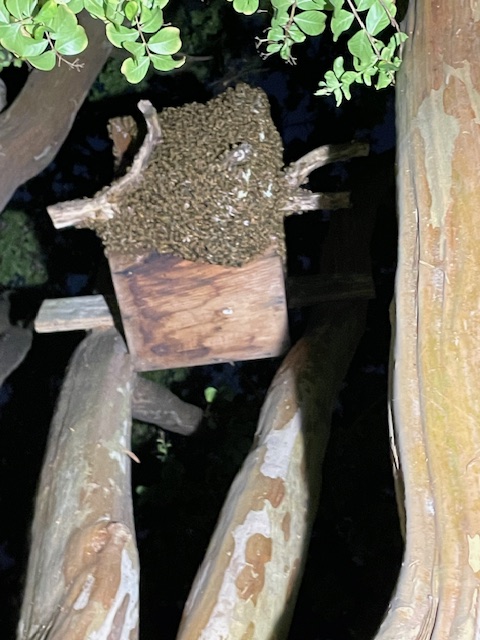
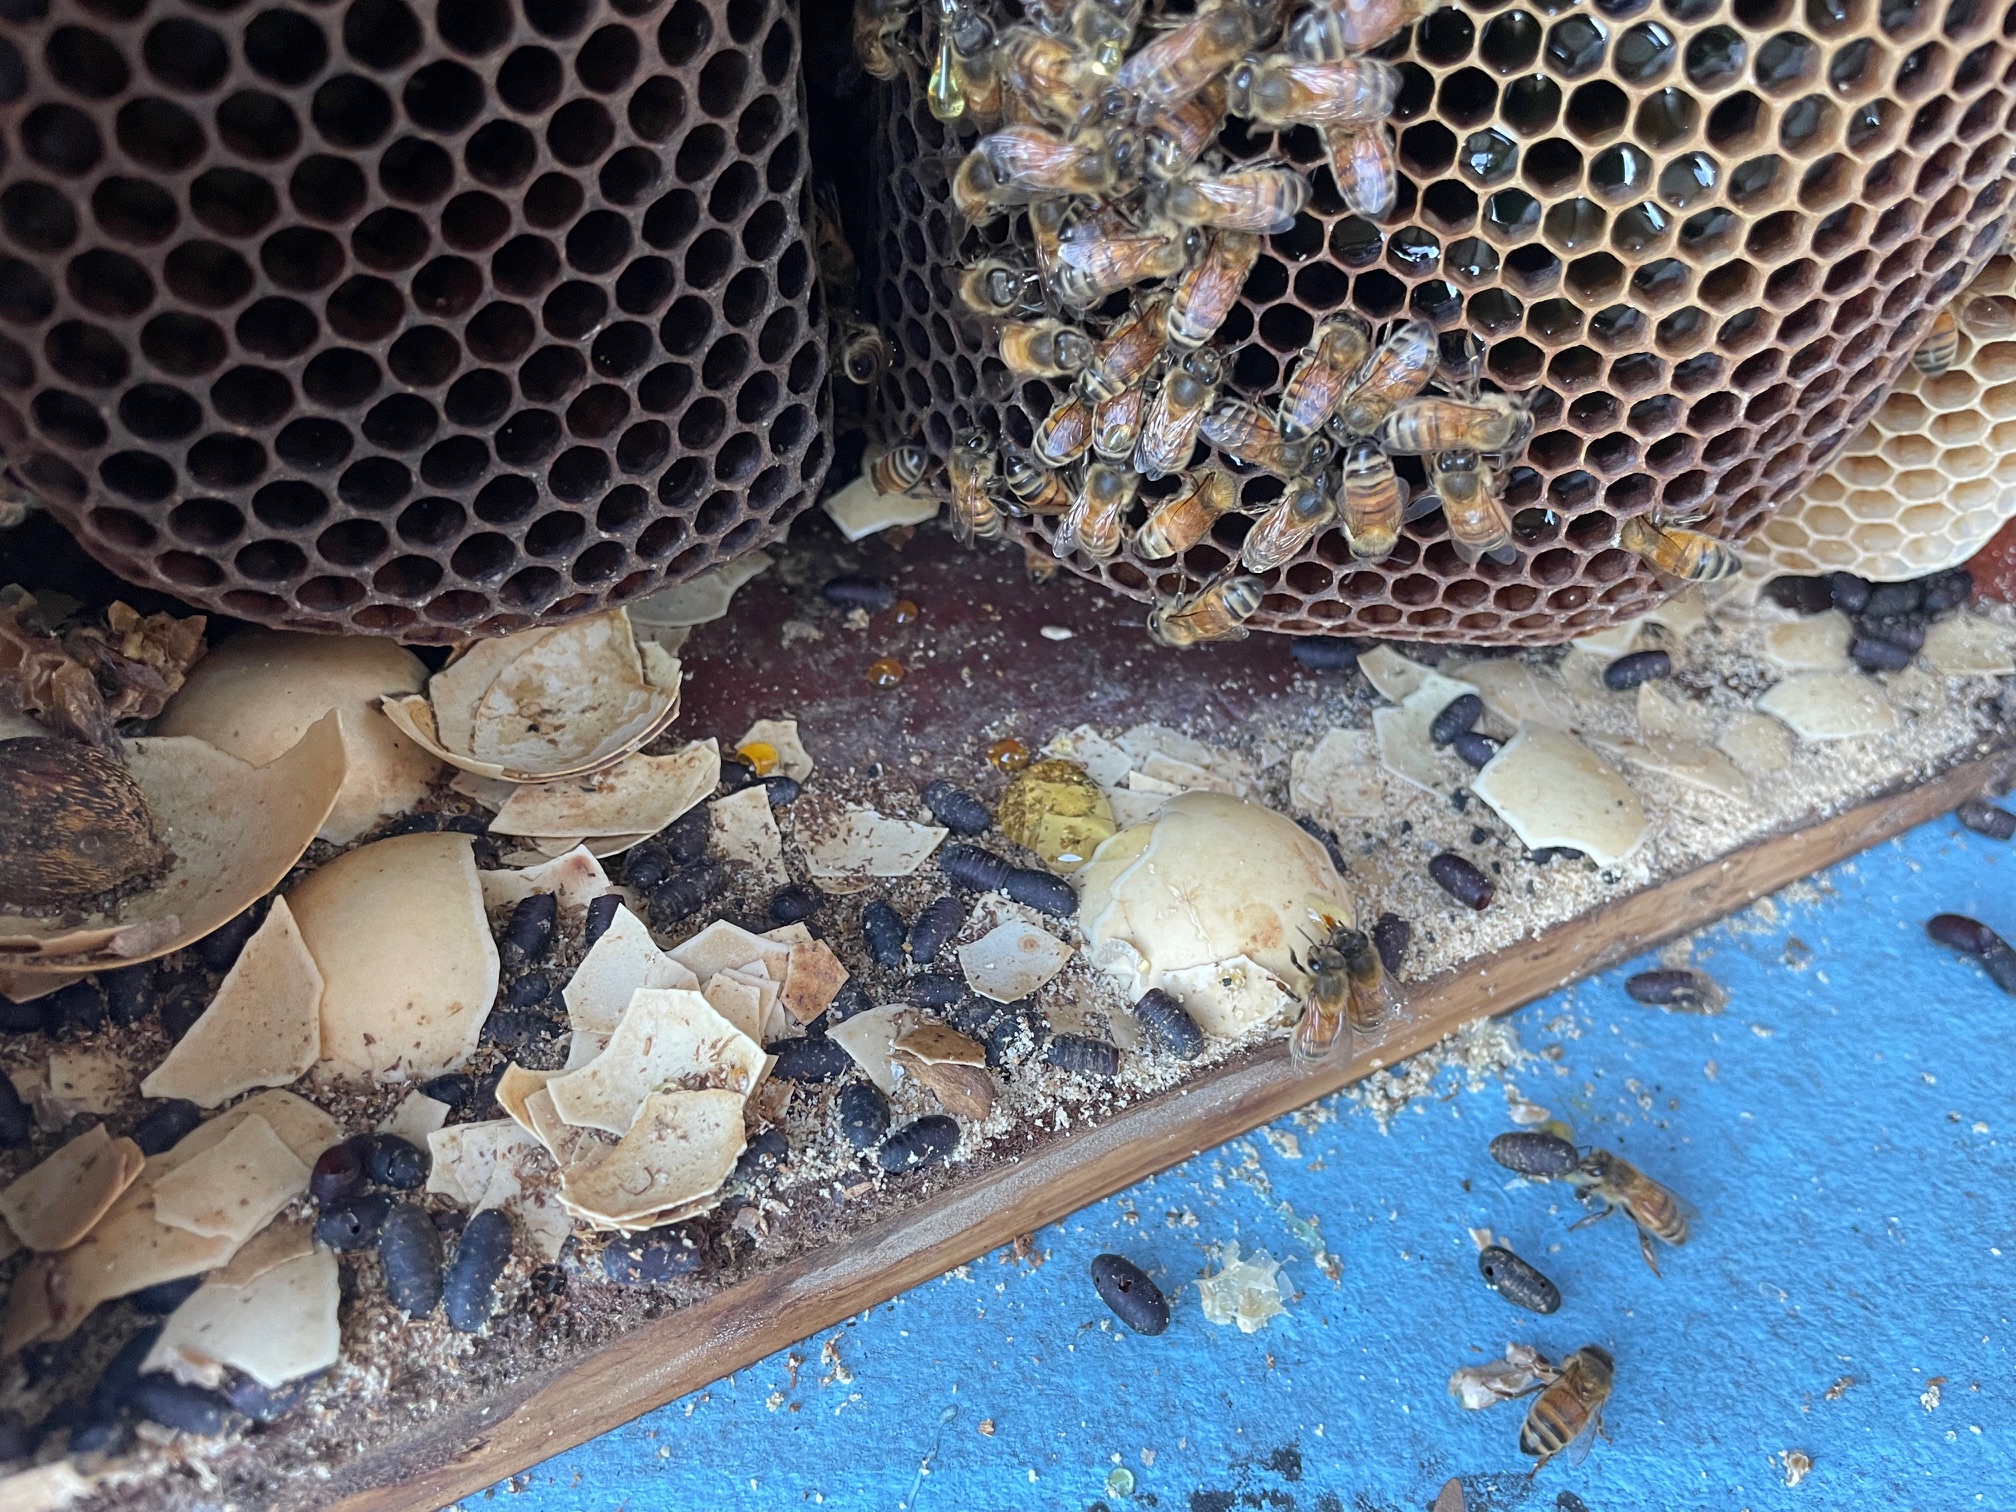
Below is another possum box, from Beverley Park. The owner said that possums never lived in it. It hosted DUCKS, and then bees. I did not really believe him until I saw the duck-egg shells at the bottom of the box!

This colony in Epping was about 7 months old. Removal and all repair (including painting) took 6 hours. The bees were saved and relocated. My son (in photo, 17 then, now 22) was stung 7 times. He jumped around a bit, but never complained… The bees came in through a weep-hole in the bricks. I use a bee-vacuum to collect the bees. It sounds rough, but it is the safest way for the bees…

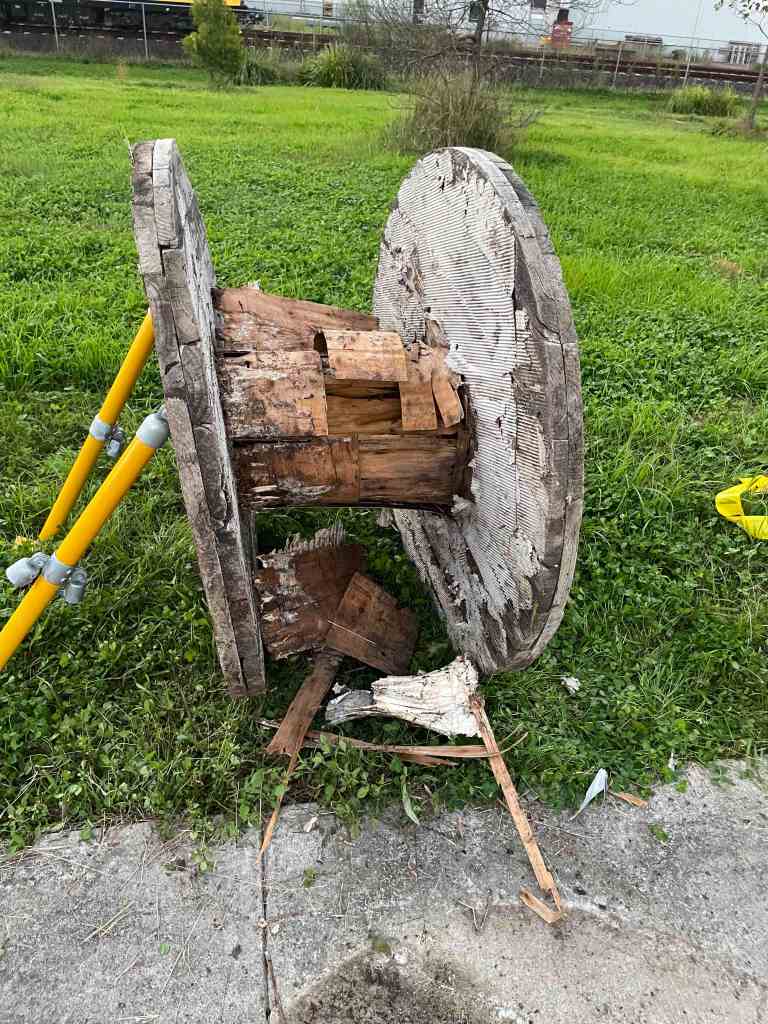
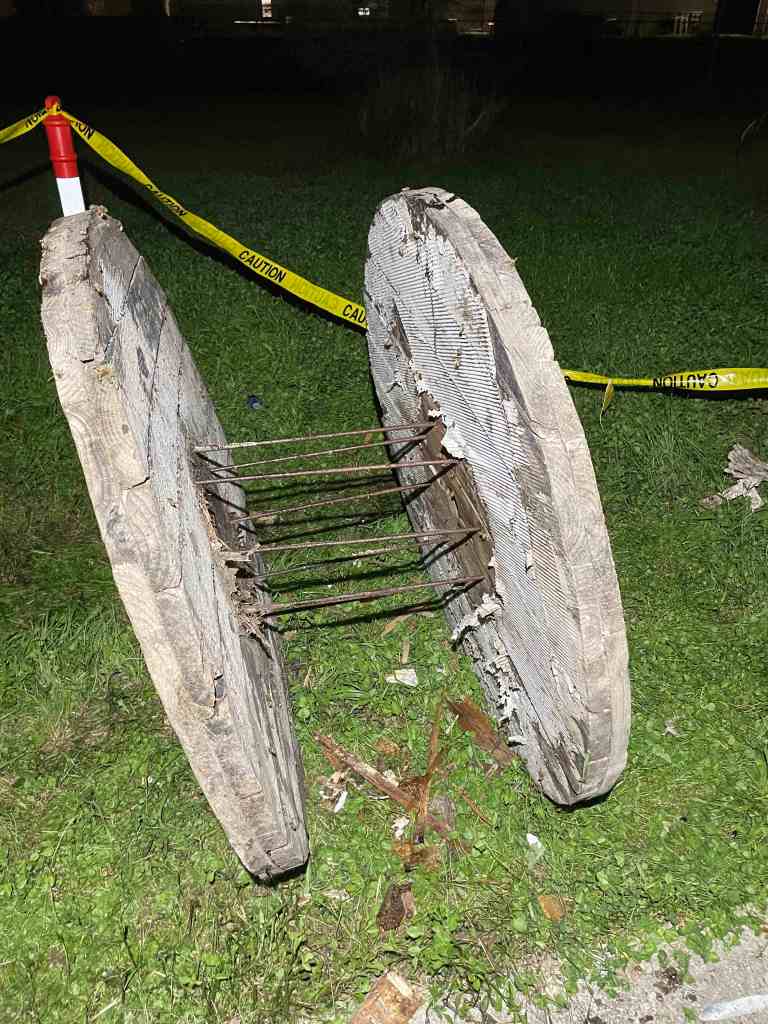
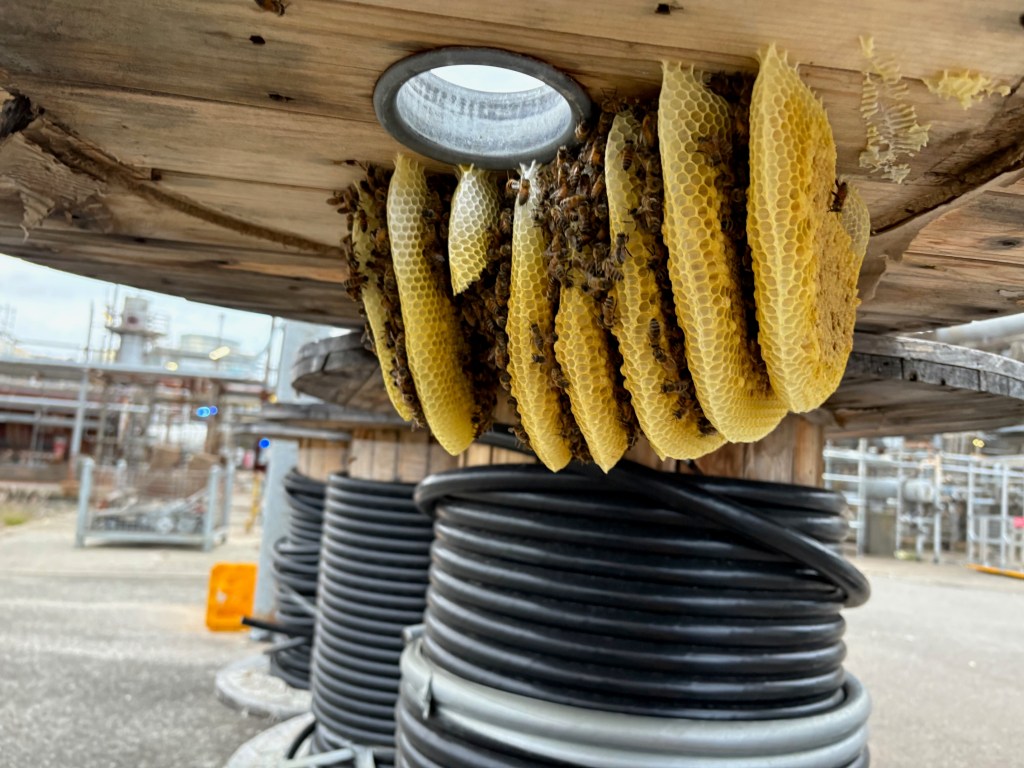
This was a unique job, at the Metro Trains depot at Tallawong. The bees had moved into the hollow core of a cable spool. I removed the cable and peeled back the decaying wood veneers to expose the colony:


Below is another “novelty” location, where the bees built their combs inside a pallet at the Lion Nathan / Tooheys Brewery in Lidcombe. I vacuumed most of the bees off of the beeswax combs before taking this photo:

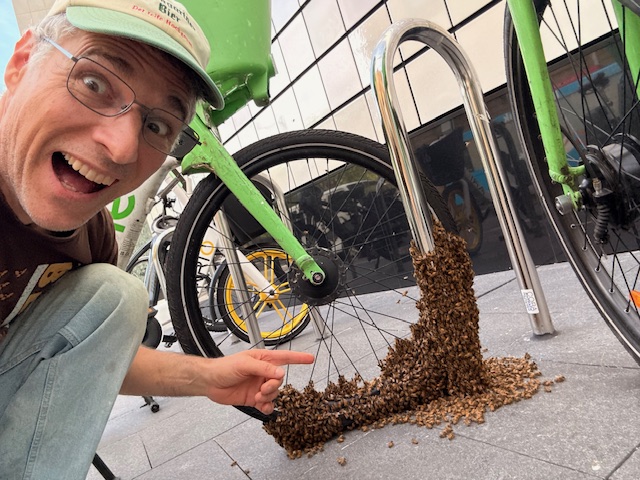
On the novelty theme, I got two calls within 1 week in Nov 2025, the GREEN bike is just behind Circular Quay, the BLUE bike was at a Metro station on George street!

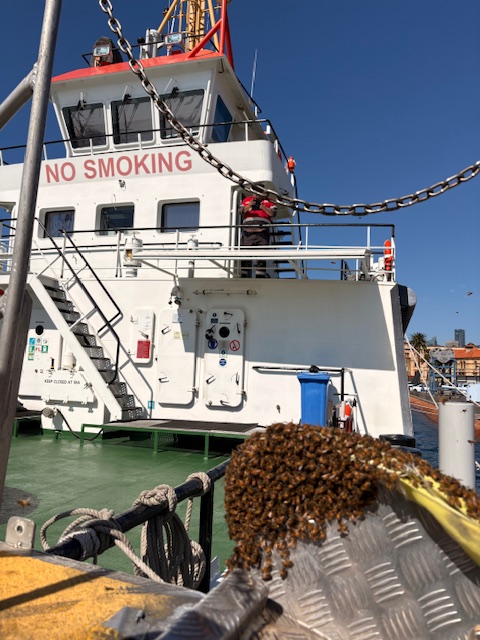
Another novelty job: The MacLeay is a fuel tender at Garden Island. The crew was very relieved when I removed this swarm from the gangplank!

Back to bee-in-homes: Honey bees love the snug comfort of a wall cavity, but very occasionally they will move into an open attic space (vulnerable to ants/roaches/rats). This photo from Chatswood shows wax combs attached the roof tiles. Older combs had fallen off (lying flat on the water tank) -probably due to summertime heat on the tiles… But the remaining bees were healthy and now making honey in my apiary.

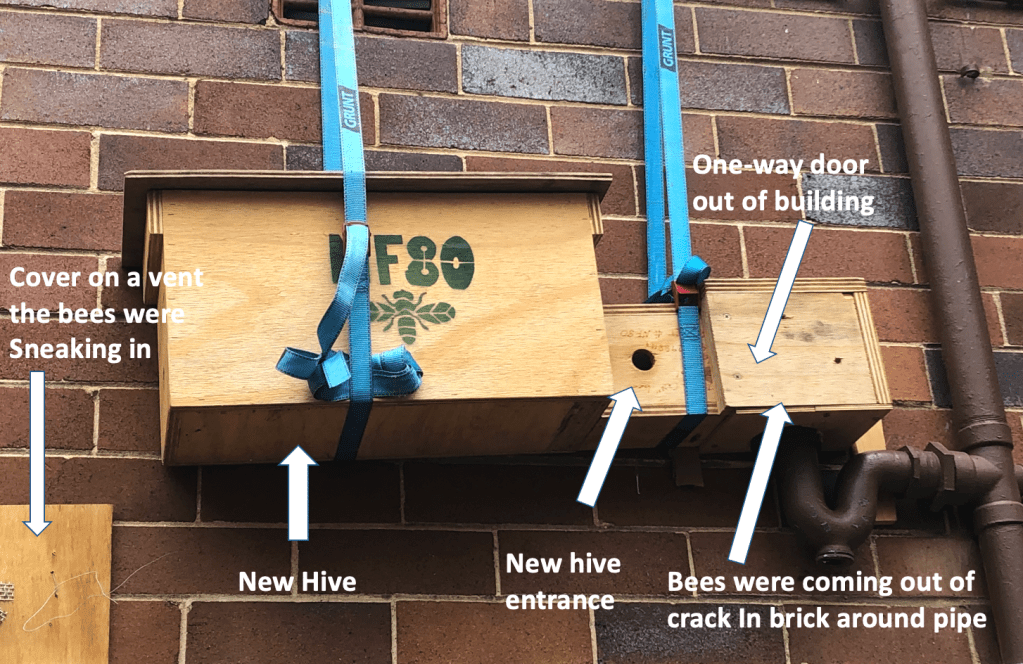
If access to the wall/ceiling/tree cavity is impossible, I can do a “Trap Out” colony removal. I place a one-way door over the entrance and a beehive beyond that. Over several weeks, all the bees will have to leave the hive (they never poop in the hive), but the one-way door prevents them from getting back in. They establish themselves in the external hive, which I can then move to an acceptable location.
Below is trap-out, in Neutral Bay. I left it for 2 months, by which point the bees were fully established in their new hive. The bees had moved in through a gap around the drain pipe. It was impossible to remove them directly through the ceiling of the bathroom without disturbing fireproofing and waterproofing…
Trap-out removals SOUND like a good solution, but they often take many visits to seal alternate entry points, making them very expensive if you live far away from my home. They also result in the honey remaining in the wall, which attracts ants/roaches/rats. I only do them when there is no other option…
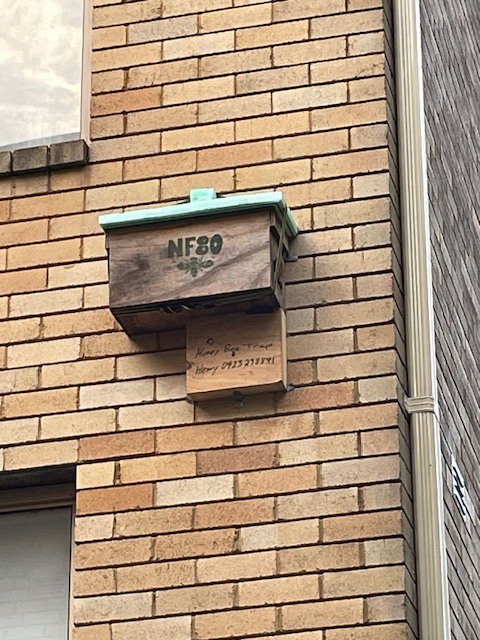
The photos below show a trap-out in Bondi. The bees accessed the wall via a standard vent and were living in the cavity between the inner and outer brick walls. Removal of bricks was not practical, so we used the trap-out method to relocate them. After bees were removed, I covered all nearby vents with galvanized vent-covers with flyscreen.

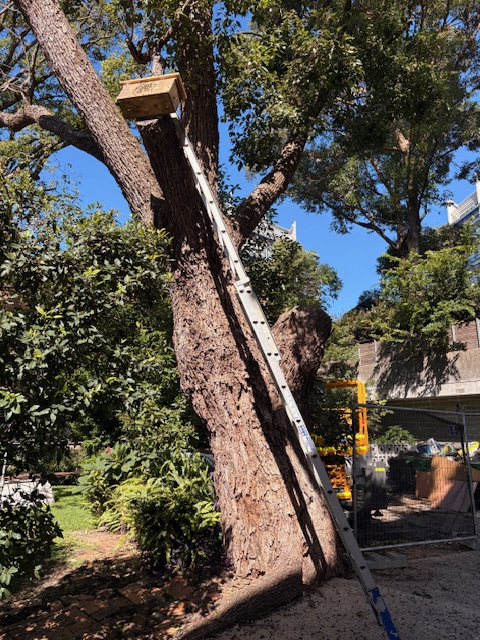
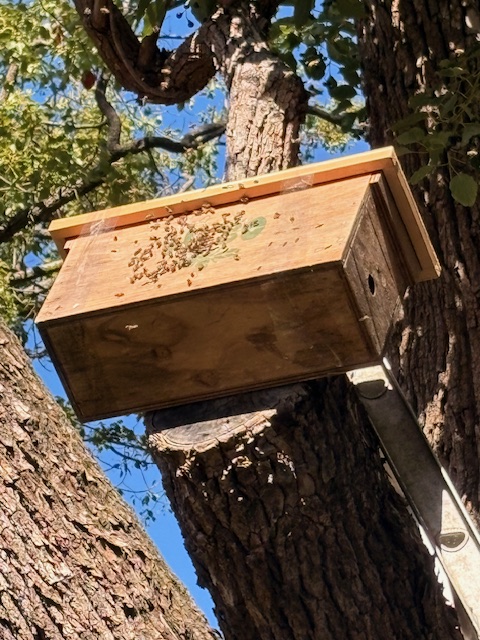
Below is another trap-out, where the bees were nesting in the hollow cavity of a branch that had been cut off. No bees were left behind when I removed it after 2 weeks.
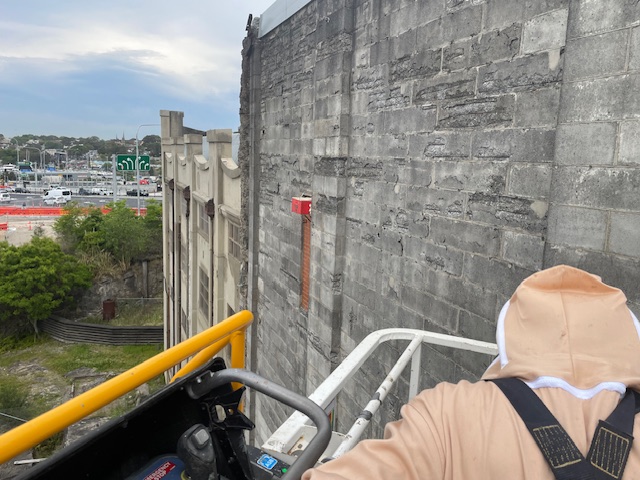
Doing trap-outs at a much larger scale, I was asked to remove two colonies living in the wall at the old White Bay Power Station (West end of the ANZAC bridge). I brought an extra suit for Ricky, my host on the huge boom-lift.


Below is another trap-out removal, at NIDA in Kensington. The bees were nested within the double-brick wall, direct access was impossible. The Lower part of the “snorkel” covers the vent that the bees were using to enter the wall. The bees then travel up the pipe to the beehive mounted above. After 4 weeks, the bees were re-established in the beehive and I could relocate it safely.


Empty wine barrels also make a good home for honey bees !

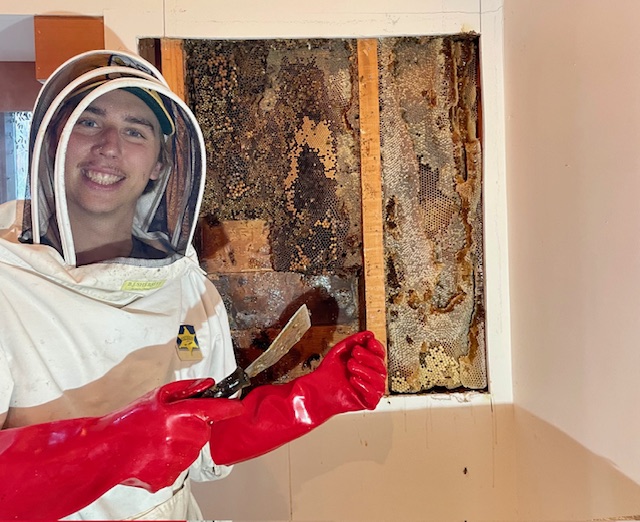
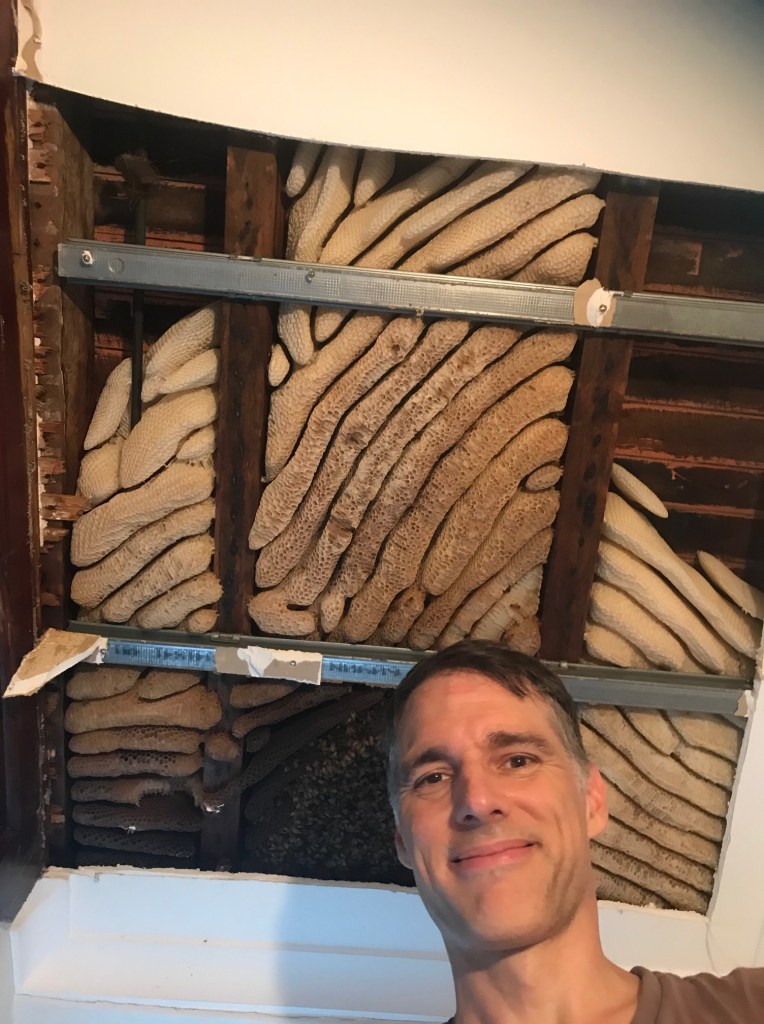
Here is another job my son, Adrian, helped with in Bayview, The nest was about 3x larger than the opening shown. It was at least 5 years old. Incredibly, a property inspection at time of home purchase a couple months earlier did not find it…
This job in Riverstone was a typical removal from the wall of a brick-veneer home, but it is unique in that the bees are building UP from the bottom. It is far more typical for them to build DOWN from above. The photo also clearly shows the bulls-eye brood pattern which is a result of the queen laying eggs in successive bands. As the bees hatch-out, they are replaced by more eggs, perpetuating the pattern.

This colony in Ryde was in place for 5+ years. The bees had been poisoned in the past, but the poison wore-off and the hive was re-colonized by bees a couple years later (the entry-point was not sealed…) Unfortunately, due to the poison, we could not save the honey, but we re-homed the bees to a regular beehive. Bees will smell the honey in “abandoned” hives and go to extreme lengths to get to it. It is best to remove the honey and back-fill with insulation in situations like this.

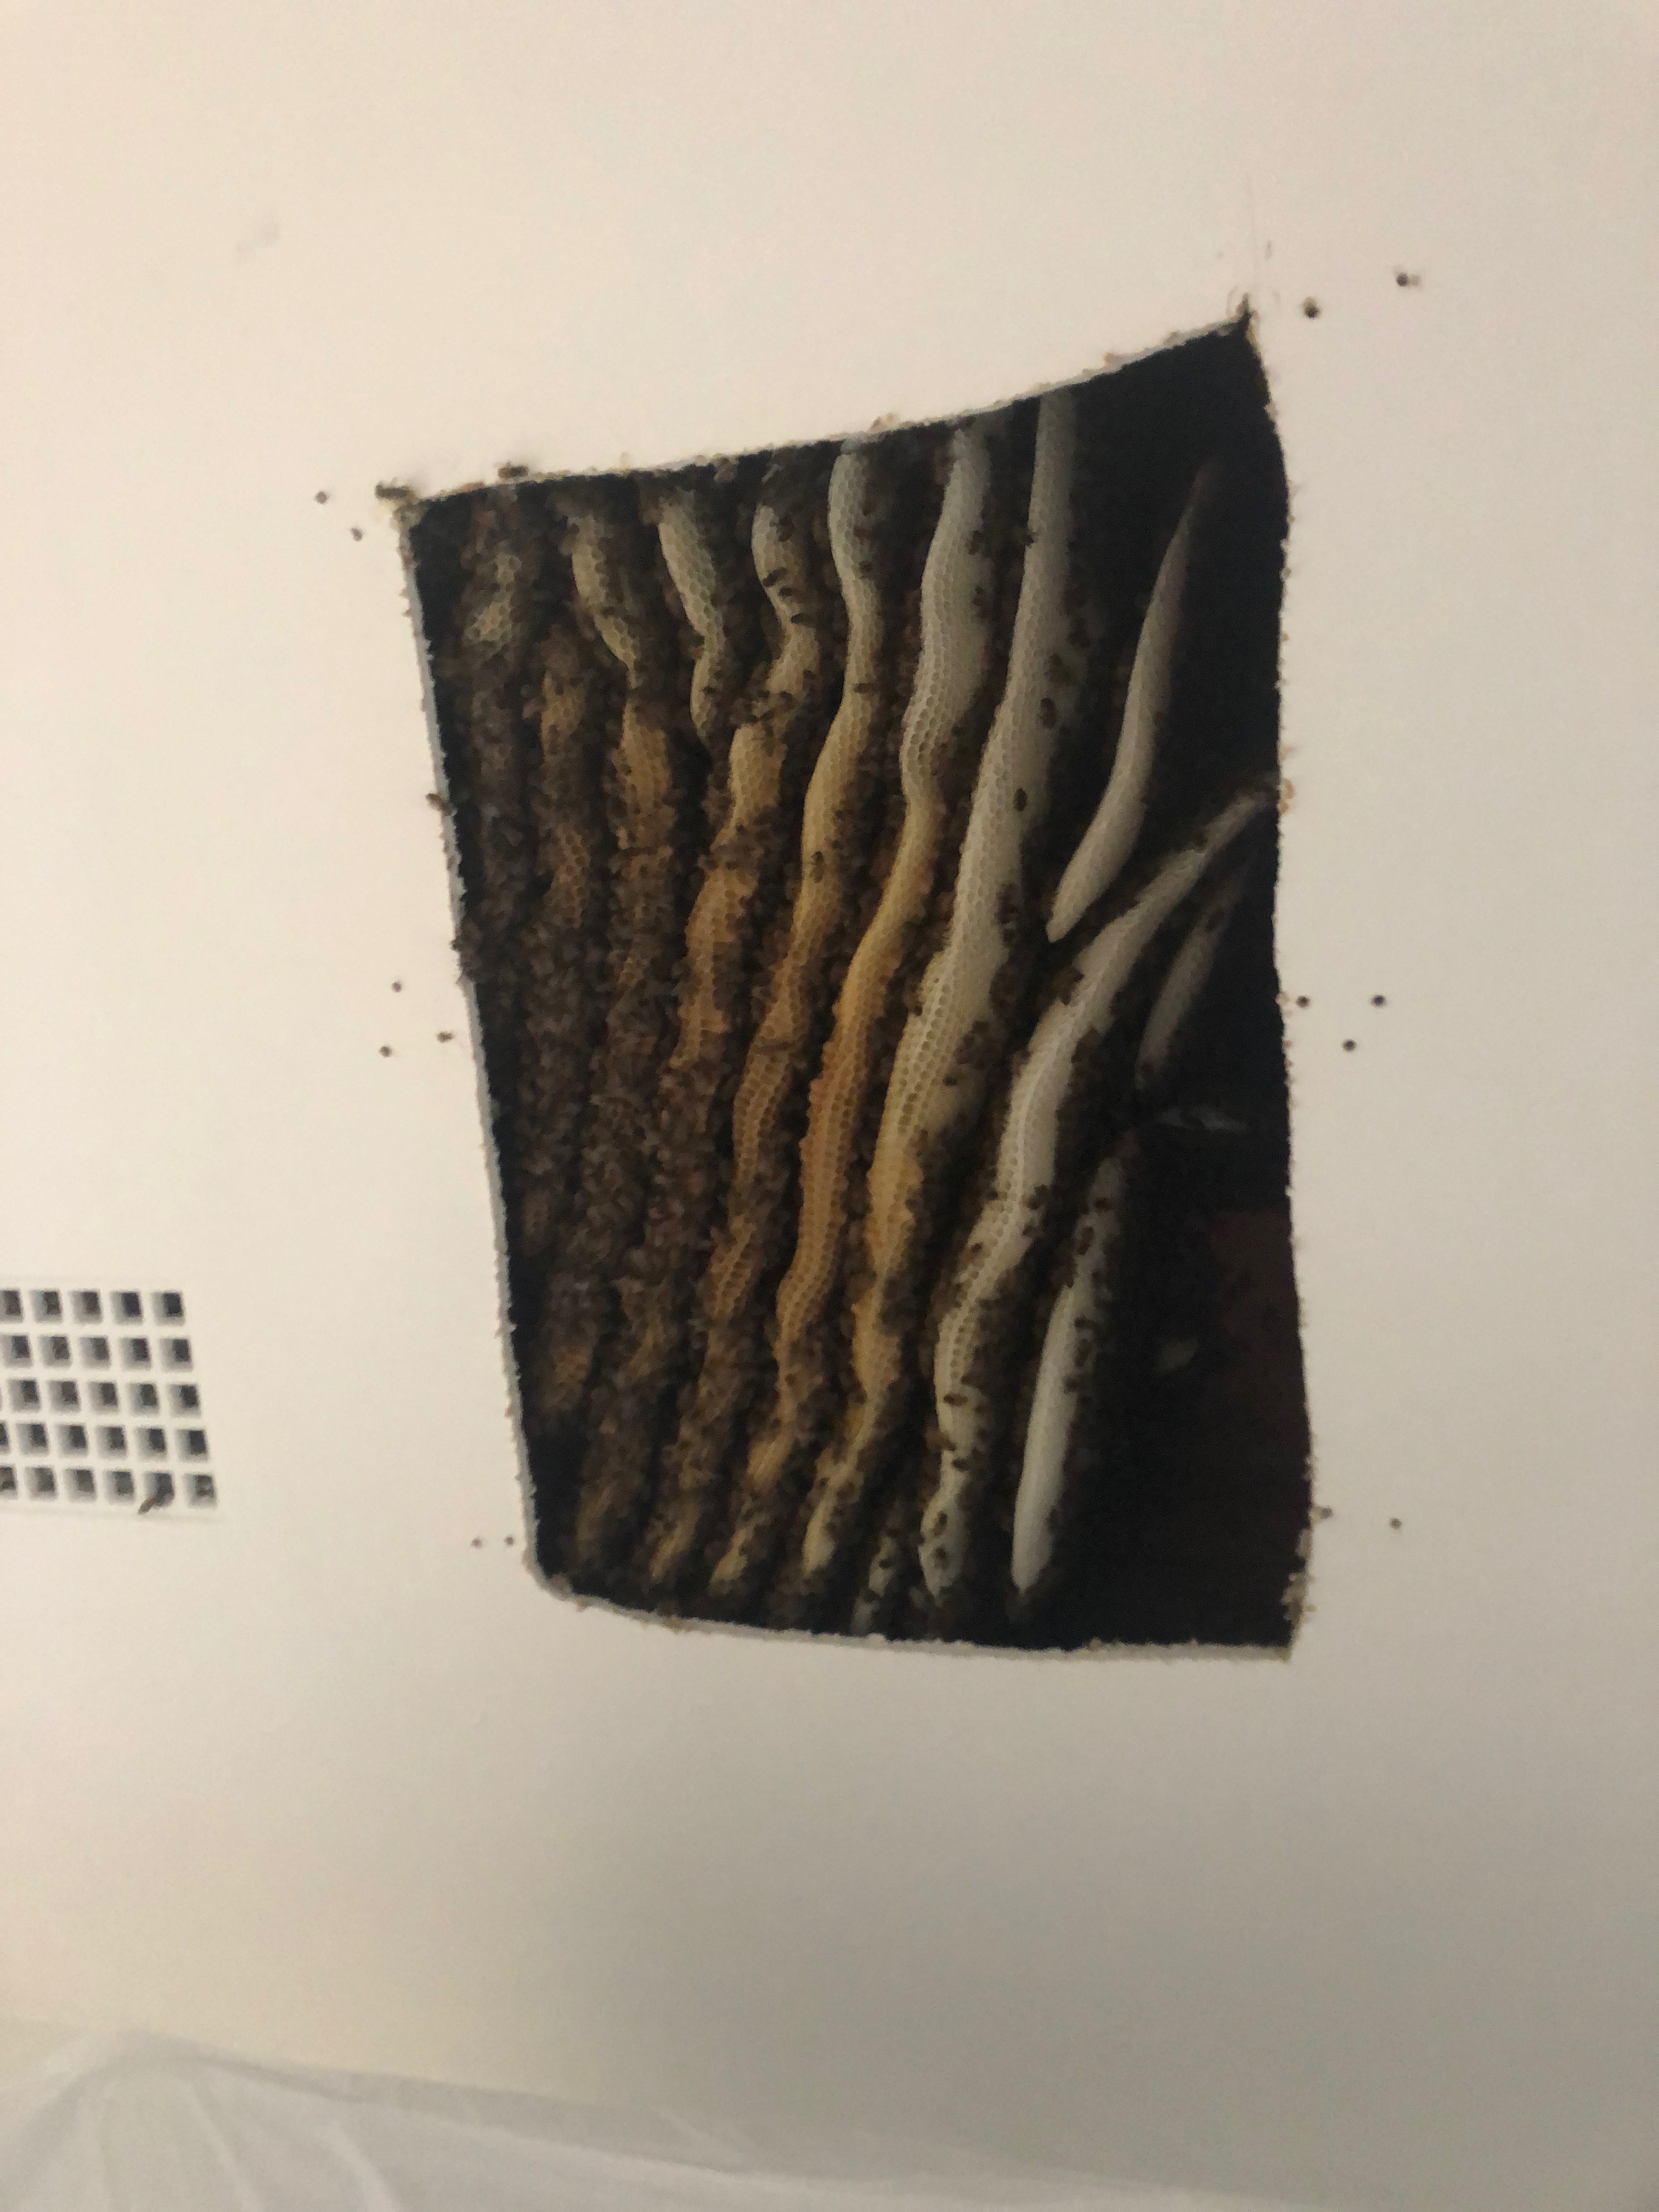
This colony in Drummoyne was several years old. The bees were VERY friendly, which made removal much easier. You can see the bees in the dark patch behind my head. All of the white combs are for storing honey, over 50kg of delicious honey was salvaged from this nest.
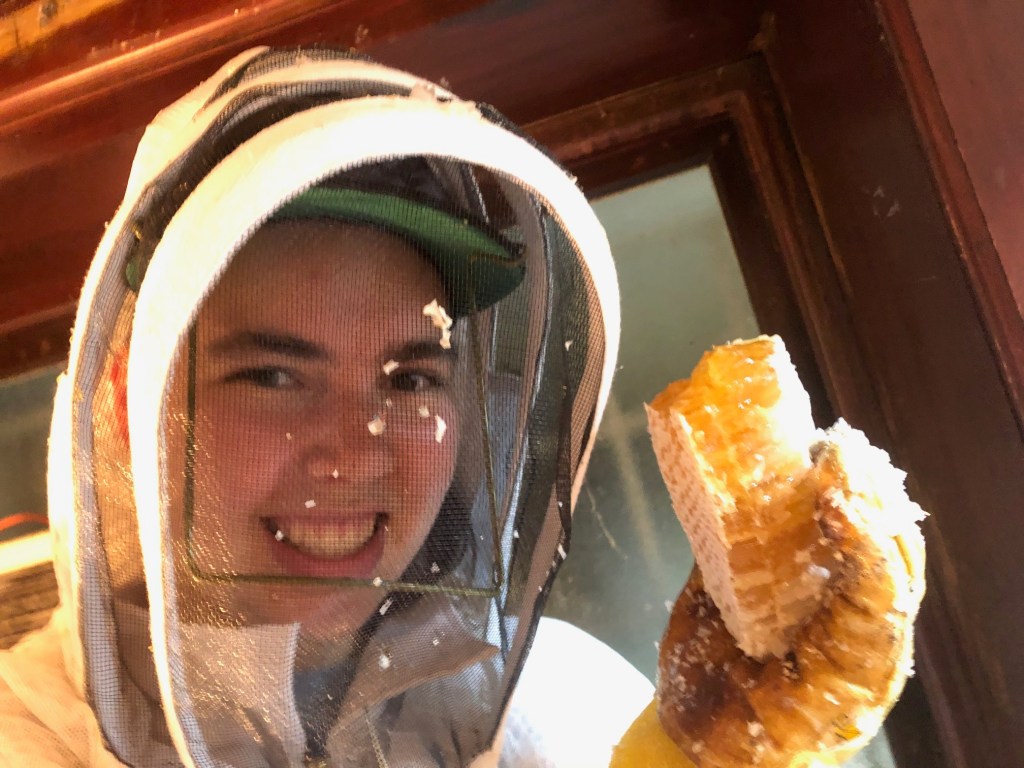
This is my daughter (15 then, 19 now), helping with the job. She did not get stung at all, this time…
This job was in Allambie Heights. The bees were there less than 2 weeks.
Brick-veneer construction with no insulation leaves plenty of space for a bee nest between vertical studs. Bees entered from a standard wall vent immediately below this cavity. There are at least 5,000 bees in a colony this size.

This photo is a colony in Hunters Hill. The yellow cells in center are bee brood (bee larva sealed-in to undergo metamorphosis into flying insects). The white patch in upper right is mature honey.

This job in Oatley was a gold-mine for honey. It was only 2 years old, but the bees were very productive. We pulled back the carpet, cut a hole in the sub-floor, and opened it up to find these slabs of delicious honey -over 30kg! Repair is these cases is quick and easy, making the total cost of the removal more reasonable.
This colony in Green Valley had very little honey…

Here the bees have been removed…
Here the plasterboard has been repaired, ready for painting…

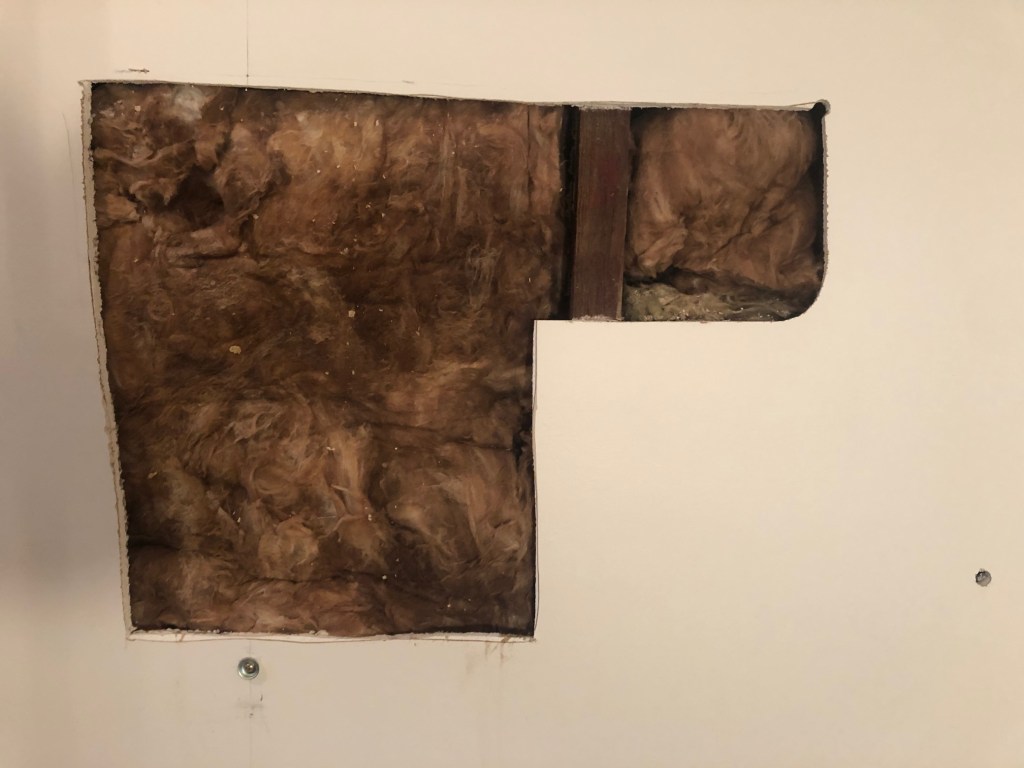
This is at a home in Redfern. The bees found the one section of wall that did not have insulation. They were there for about 2 weeks.
I had to extend the opening into the next cavity to catch all of the bees…

Here I have filled the cavity with glass-wool insulation, making future re-colonization by bees impossible… (and completing the insulation of their wall!)
Sometimes bees living in trees also need to be relocated. The hollow in this tree extended as far as I could reach. I also used a chemical bee “repellant” to encourage the bees to come out to where I could catch them.

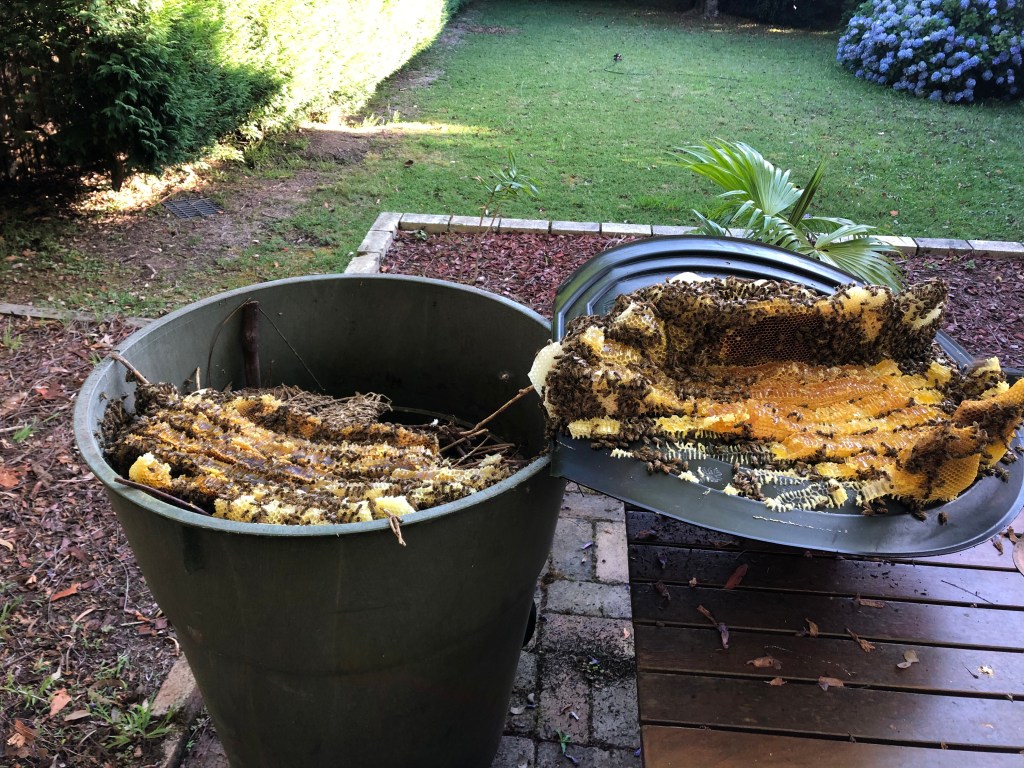
Most people in Ku-Ring-Gai council area will remember these green-waste bins. This one was untouched for 5+ years… A small twig held the lid open a crack and bees moved in, probably two summers ago.

Trees are the bee’s natural home, but I occasionally get calls for removal of bees when trees are being cut down. In the project below, in Hurstville, I sealed the bees into the tree by covering their entrance at night. The arborist then cut out the trunk section that held the bees and left it on the ground for me. I cut it in half to gain access and then carefully removed the combs and transferred the bees into a hive. The “beekeeper” in the photo below is actually the homeowner, thanks for your help, Sam!


Short Video here: https://www.instagram.com/p/C85krRrSv2G/
This colony was in the small roof of a bay window in an old Victorian in North Sydney. The ceiling was plaster-and-lath construction. The black combs were probably 10 years old…

This is after full repair of the plaster:

This was a colony in Newtown, where bees had re-settled in an old colony. The yellow foam was from previous attempts to keep the bees out (they will try very hard to get into cavities that smell good to them from previous colonies…):
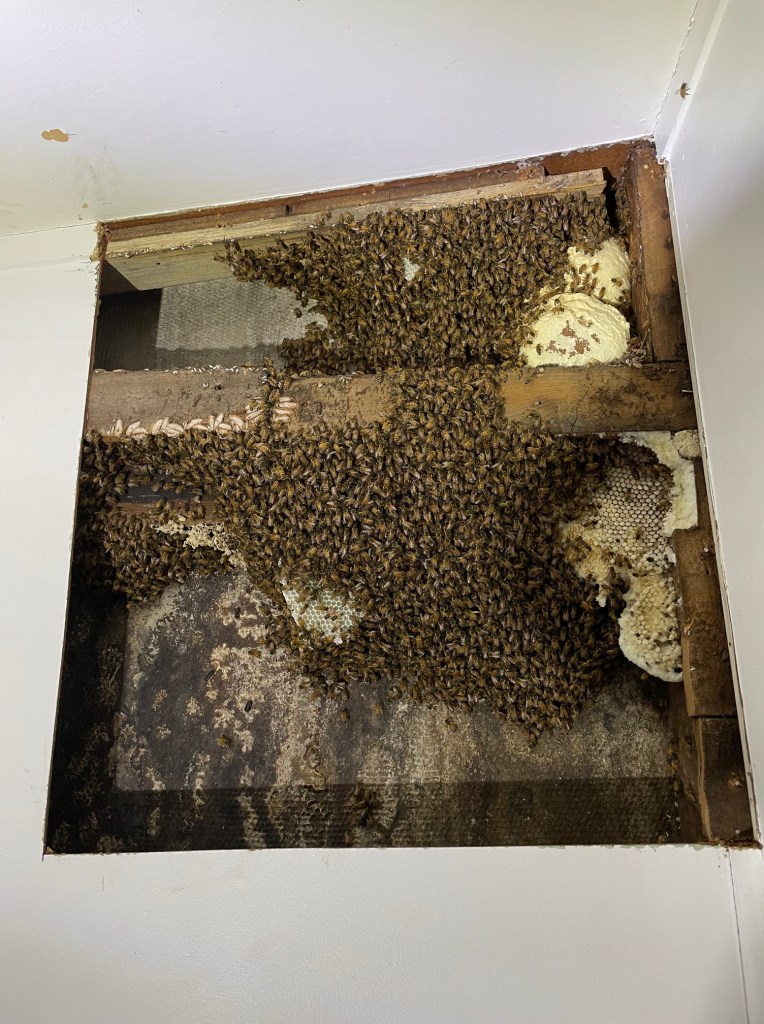
Photo below shows bees happily living in a compost bin in Concord West. The lid was slightly crooked, allowing their access. In 1 year they filled the available space…

The Botany Bay Industrial Park hosted these bees inside the center of a cable spool. The photo shows the flat end that I have lifted off of one spool and balanced on another to gain access to the bees. I needed special permission to light my smoker next to the facility that makes polyethylene.
Back to main page click HERE
If you have read this far, you may be interested enough to watch some videos of removals I have done. Please click here for my YouTube channel, or here for my Instagram channel.
Please call me at 0423 298 841 to discuss your bee situation.
